Sharing
Datafiles
via iTunes
via iTunes
Return to User Guide Index
Note: The following procedures require iTunes 10.5.1 or newer.
Being able to create and modify datafiles on a Mac, with its large keyboard and mouse (or touch pad), is generally more convenient than doing the same using the iPhone keyboard. Furthermore, iData on the Mac provides more tools for modifying your data and the structure of your datafiles, including sorting.
The iData synchronization procedures provide a way to maintain copies of a datafile on both platforms and to synchronize changes made to either copy with the other copy.
The usual way to do this is to first create a datafile using iData on the Mac.
Sometimes, however, you may want to create a datafile on the iPhone and copy it to the Mac. This can be done using iTunes file sharing, as explained below.
Public and Private Folders
iData Mobile Plus maintains two folders for datafiles, Private and Public. It places newly added datafiles in the Private folder, where they can be accessed only by someone who is able to run iData Mobile Plus on your iPhone.
In order to use iTunes to share a datafile, that datafile must first be moved to the Public folder.
Moving a Datafile to the Public Folder
Here is what the Datafiles list looks like when all datafiles are in the Private folder.
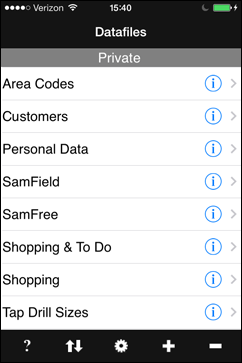
To move a datafile into the Public folder, tap the
 button to the right of the datafile name. This will bring up
the Datafile Settings
window:
button to the right of the datafile name. This will bring up
the Datafile Settings
window:Tap Set File Sharing, which will bring up the following window.

Turn file sharing on by tapping the button in the lower right corner:
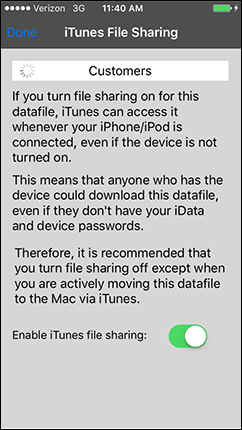
If you are satisfied that you have the correct datafile, click the Done button in the upper left corner. The datafile will then be copied into the Public folder. This may take several seconds, depending on the size of the datafile, so the progress wheel to the left of the datafile name will spin so that you can know that iData Mobile Plus has not simply frozen.
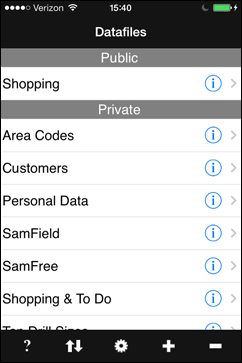
When the Datafiles list returns, you will see that the datafile is now in the Public folder:
Copying a Datafile to the Mac via iTunes
1. Use the USB cable to connect your iPhone to your Mac.
2. Run iTunes. (Note that the following screen shots may not look the same as what you will see in various versions of iTunes.)
3. When your iPhone shows up in the lefthand column in iTunes, select it. (Your iPhone does not have to be on to do this.)
4. Next, select the Apps tab at the top of the righthand window.
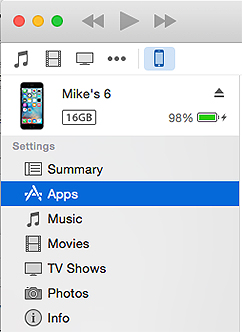
5. When the File Sharing section appears at the bottom of the righthand window, select iData Mobile Plus in the Apps list.
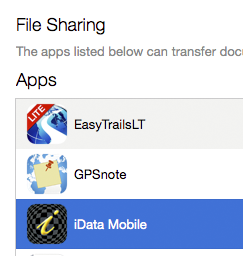
Note: it may take a while for the File Sharing section to appear. Sometimes clicking on the Info tab, then back on the Apps tab seems to speed things up.
6. In the iData Mobile Plus window, click on the name of the datafile to be moved. (You may command-click to select multiple datafiles.)
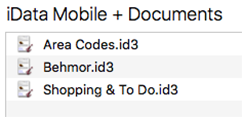
7. Click the Save to... button at the lower right.
8. When the Open dialog comes up, select the folder where you want to place the datafile. This should probably be your iData Pro Datafiles folder, or a subfolder within it, so that it will be readily available to iData on the Mac.
9. Click the Open button to save the datafile.
10. Once the datafile has been successfully copied to the Mac, you can use the standard synchronization procedures to keep the Mac version and the iPhone version in sync.
Copying a Datafile from the Mac
You should normally use iData on the Mac to move a datafile to iData Mobile Plus, in order to keep both copies of the datafile in sync. However, it is possible to copy a datafile from the Mac to the iPhone via iTunes.
First, close iData Mobile Plus. Then, follow steps 1 through 5, above.
Next, you can simply drag a datafile from the Finder directly into the iData Mobile Plus window in iTunes.
Or, click the Add... button. This will bring up an Open dialog in which you can select one or more datafiles. Then, click the Open button in that dialog.
You should now see the selected datafile name(s) in the iData Mobile Plus window in iTunes.
Open iData Mobile Plus on the iPhone to see that the selected datafile now shows up in the Public folder.
Moving the Datafile to the Private Folder
Because iTunes can access any datafile that is in the Public folder even with the iPhone turned off, there is no way for iData Mobile Plus to prevent access to such a datafile.
If you want to restrict access to a datafile to only those who can view it in iData Mobile Plus, you should move the datafile back to the Private folder after you have used iTunes to copy it to your Mac.
To do this, simply reverse the above procedure. Use the
 button to the right of the datafile name to open the iTunes File Sharing
window, then tap
the button in the lower right corner to turn it off. Then,
click the
Done button.
button to the right of the datafile name to open the iTunes File Sharing
window, then tap
the button in the lower right corner to turn it off. Then,
click the
Done button.The datafile should now show up in the Private section of the Datafiles list.