Full Details
The iData
synchronization procedures provide a way to maintain
copies of a datafile on both platforms and to
synchronize changes made to either copy with the other
copy.
A New
Synchronization Process
iData Mobile Plus until version 1.1.14 was able to use
WiFi and Dropbox to transfer datafiles between the Mac
and the iPhone. Neither of those methods are available
in iData Mobile Plus 1.1.16.
The good news is that the Mac Finder has the ability to
transfer datafiles between the Mac and the iData Mobile
Plus Public Datafiles list over a cable
connection.
A datafile can be copied from the iPhone, synchronized
with its corresponding datafile on the Mac, and then the
synchronized result can be copied back to the iPhone.
First Things
First – Security
As in previous versions of iData Mobile Plus, the iData
Mobile Plus Datafiles list offers two sections,
Public and Private.
The Public section lists datafiles that are
accessible even when iData Mobile Plus is not
running –– and even when the iPhone is not turned on.
This means that even if you have a password set for
iData Mobile Plus, the datafiles in that section are
accessible.
The Private section lists datafiles that are
accessible only within iData Mobile Plus.
Our recommendation is that you place all of your
datafiles in the Private section, moving them to
the Public section only while transferring them
to the Mac for editing or synchronization. Then, move
them back to the Private
section.
Although iData Mobile Plus has always offered a way to
move one datafile at a time between the Public
and Private sections, version 1.1.6 lets you
move all of your datafiles with just a couple of taps.
Moving All Datafiles to the
Public Section of the Datafiles List
1. At the bottom
of the Datafiles list is a button bar. Tap the
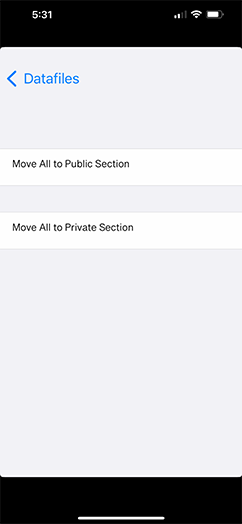
second button from the left ( ) to open the datafile
transfer window. ) to open the datafile
transfer window.
(If you change your
mind, you can just tap the blue < Datafiles
at the upper left of the window, and the Datafiles
list will reappear without any change.)
2. To
transfer all datafiles from the Private section
to the Public section, tap the Move All to
Public Section button.
Within a couple of
seconds, you will be returned to the Datafiles
list, and will see that the Public section now
contains all of your datafiles.
Since the Private
section is empty, its name bar is not shown.
Moving
Datafiles From the iPhone to the Mac
1. To avoid confusion, you should
create a folder on the Mac that will hold datafiles that
you copy from iData Mobile Plus on the iPhone.
The following
explanations will assume that you have created a folder
called iData Mobile Plus Datafiles
within your Documents folder.
(Depending on your
situation, you may actually want to have one folder for
your iPhone datafiles and another for your iPad
datafiles, e.g., iData
Mobile Plus iPhone Datafiles
and iData Mobile
Plus iPad Datafiles .)
2. On the iPhone, open iData Mobile
Plus and move all datafiles to the Public
section, as explained above.
3. Use a USB cable to connect the
iPhone to the Mac.
4. On the Mac:
a. Under Locations
in the sidebar of any Finder window, select your iPhone.
That window will then display a window for the iPhone.
b. In that window, below
the iPhone's name, you will see a horizontal list of
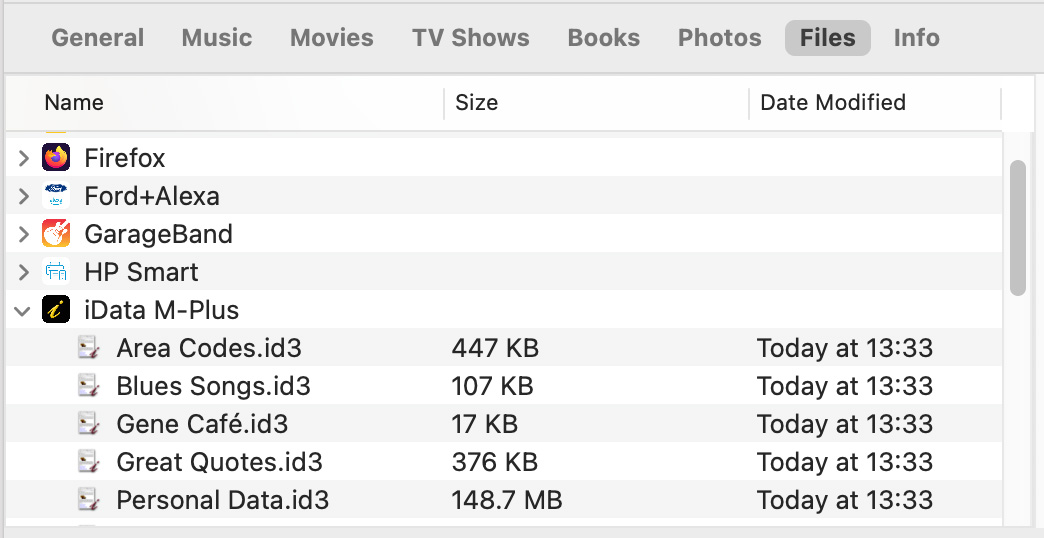
topics. Click on Files, and a list of iPhone
apps will appear. One of the items in that list will be
> iData M-Plus.
c. Tap the >
to reveal a list of the datafiles in the Public
folder of iData Mobile Plus on your iPhone.
d. Select one or more .id3
datafiles in the list and drag them to your iData
Mobile Plus Datafiles folder.
Moving
Datafiles From the Mac to the iPhone
1. Drag the desired .id3 datafile from
your Datafiles folder to the iData Mobile Plus item in
the Files list. When the iData Mobile Plus line
highlights (blue in following image), release the mouse
button. (The datafile being dragged in the example is
"Bluegrass Banjo Tunes.id3".)
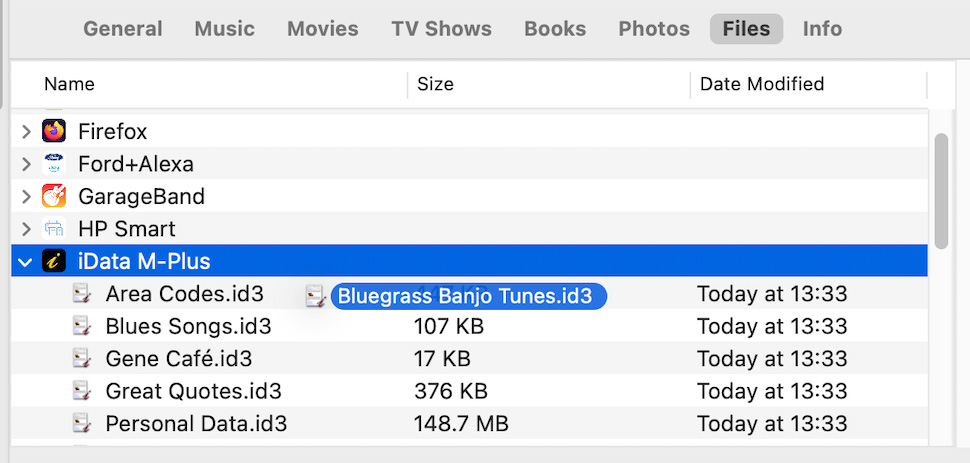
2.The result will look like this
in the Finder window:

The Synchronization
Procedure
1. In iData Mobile Plus, move all
datafiles to the Public section of the Datafiles
list, as explained above.
2. Move the datafile(s) that you want to synchronize to
the Mac, as explained above, dragging them into your iData Mobile Plus Datafiles
folder. Do NOT open those datafiles in iData
Pro.
3. Open the Mac version of the
datafile (in your Datafiles folder) in iData
Pro. We'll refer to this as the Local datafile.
Here's a sample:
4.
Select Synchronize Datafiles... under the File
menu.
5. iData Pro will then put up an Open
dialog, asking you to select the corresponding datafile
in the iData Mobile Plus
Datafiles folder. Select that datafile, and
click the Open button. We'll refer to this as
the Remote datafile.
6. If
there are no records that have been modified in both
datafiles, you will not even see a window for the Remote
datafile. Instead, the Local datafile
window will briefly disappear. When it returns, any
required changes will have been applied to the Local
datafile, and the Remote datafile will have
been replaced by a copy of the Local
datafile in the Finder.
7. If there are records that do not
match between the two datafiles, the Remote
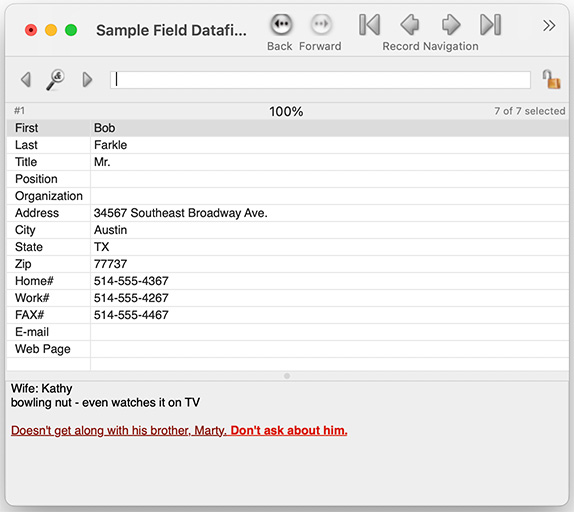
datafile will open. When it opens, it will look like
the original (though the size may be different), but
the Find Box will be blacked out, and most of the
toolbar buttons, along with the buttons in the upper
left corner, will be disabled, something like this:

8.
The Remote datafile cannot be edited, but
all records can be viewed, and the contents of
fields and the Freeform Text Area can be selected
and copied for pasting into the Local
datafile.
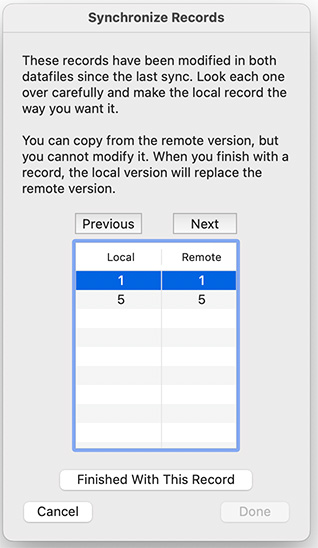
9. At this time, a Synchronize Records dialog
will open. This will show you which records have
conflicts that cannot be handled automatically.
10. The
text at the top of the dialog explains the process.
Notice that record numbers may not match in the two
datafiles. This is because records may have been
reordered in either datafile since the last time they
were synchronized. iData uses a unique identifier
attached to each record, rather than relying on
changeable record numbers.
a. Select a pair of records in
the list to cause those two records two be shown in
the two datafiles. You may click directly on a
pair in the list, or you can use the Previous and Next buttons to
move from record to record.
b. Make any desired changes to
the record in the local datafile, referring to the
matching record in the remote datafile as necessary.
When you are done, click the Finished With This
Record button, and the record pair will be
removed from the list.
c. Continue with the process
until no more records remain in the list.
d. Click the Done button. The
Remote datafile and the Synchronize
window will close, and both datafiles will be
updated in their original locations.
11.You can abort the
synchronization process either by clicking the Cancel button in
the Synchronize Records
window or by
closing either datafile window.
12. Once synchronization is
completed, use Mac Finder file sharing to transfer the
iPhone version of the datafile back to iData Mobile
Plus, as explained above.
13. If desired, in iData Mobile Plus,
move all of the datafiles back to the Private
section, as explained below. This is highly recommended.
Moving All Datafiles to the Private Section of the
Datafiles List
1. As mentioned above, the
file sharing procedure moves datafiles to and from the
Public section in iData Mobile Plus.
2. While viewing the Datafiles
list in iData Mobile Plus, tap the  button. button.
3. In the next window, tap the Move
All to Private Section button.
|


