Between Two Macs
iData Pro lets you synchronize datafiles on two networked Macs (or in different folders on a single Mac). There are two ways to do this:
Sync Over a Local Network
Sync Via Dropbox
Creating a Sync File on Another Mac Over a Local Network
1. Open the
datafile to be synced in iData Pro. If this is a datafile that
does not already contain a Sync ID, iData Pro will assume that
you want to create a sync file to match it.
2.
Choose
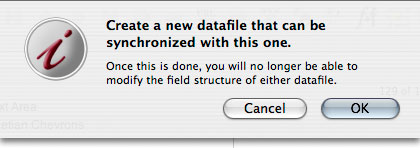
Save As New Sync File... from the File menu, read the text in the
dialog sheet that comes up, and click the OK button.

3.
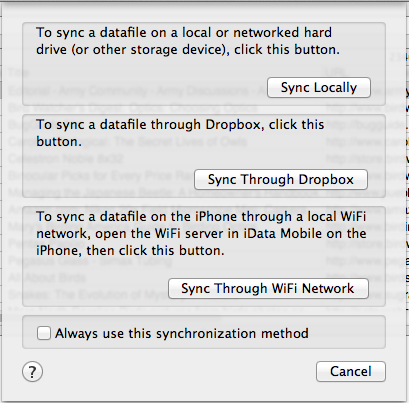
The following dialog
will appear. Click
the Sync Locally
button.

4. When the Save dialog comes up, navigate through your local network and select the folder in which you wish to save the new sync file. iData Pro will remember this location for later syncing (which will work as long as you don't move or rename the sync file).
5. Click the Save button, and iData Pro will save the sync file. Now you're ready to synchronize changes to either or both datafiles whenever you feel the need.
Synchronizing a Pair of Sync Files Over the Local Network
Once a sync file has been created on the other Mac, you can
make changes to it and/or to the original. When you want to
get both datafiles to match again, you can perform
synchronization. The process is very similar to what you did
to create the sync file in the first place.
1. Open either of the previously synced
datafiles in iData Pro. Because it will contain a Sync ID,
iData Pro will assume that you want to synchronize this
datafile (as opposed to creating a new sync file).
2. Make sure that the other datafile is
not open in any copy of iData Pro. Failure to do so could
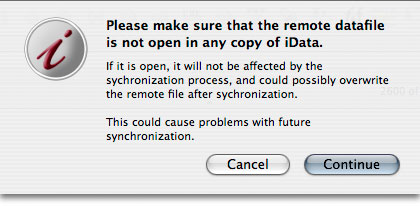
result in failure to synchronize properly. You will see the
following alert, reminding you of this:

3. Choose Synchronize Datafiles... from the File menu. (If the current [frontmost] datafile does not have a Sync ID, then both the Synchronize Datafiles... and Remove Sync ID... items under the File menu will be disabled.)
4. The following dialog will appear. Click the Sync Locally button.

5. At this point, an Open dialog will appear. Navigate to the other sync file, select it, and click the Open button.
6. You will see a Synchronizing... progress panel. When it closes, the synchronization process is complete.
NOTE: If, for any reason, the file structure of the two datafiles does not match, you will see a notification, and iData Pro will not try to synchronize them.
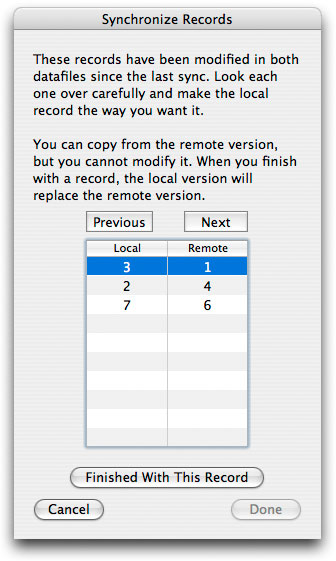
See the section on Manual Synchronization, below, to learn how iData Pro allows you to resolve those cases where changes have been made to the same record in both datafiles.
Creating
a Sync File on Another Mac Via Dropbox
1. Open the
datafile to be synced in iData Pro. If this is a datafile that
does not already contain a Sync ID, iData Pro will assume that
you want to create a sync file to match it.
2.
Choose Save As New Sync File... from the File menu, read the text in the
dialog sheet that comes up, and click the OK button.

3.
The following
dialog will appear. Click the Sync
Locally button.

4. When the Save dialog comes up, navigate through your local network and select the folder in which you wish to save the new sync file. iData Pro will remember this location for later syncing (which will work as long as you don't move or rename the sync file).
5. Click the Save button, and iData Pro will save the sync file. Now you're ready to synchronize changes to either or both datafiles whenever you feel the need.
Synchronizing a Pair of Sync Files Via Dropbox
Once a sync file has been created on the other Mac, you can
make changes to it and/or to the original. When you want to
get both datafiles to match again, you can perform
synchronization. The process is very similar to what you did
to create the sync file in the first place.
1. Open either of the previously synced
datafiles in iData Pro. Because it will contain a Sync ID,
iData Pro will assume that you want to synchronize this
datafile (as opposed to creating a new sync file).
2. Make sure that the other datafile is
not open in any copy of iData Pro. Failure to do so could
result in failure to synchronize properly. You will see the
following alert, reminding you of this:

3. Choose Synchronize Datafiles... from the File menu. (If the current [frontmost] datafile does not have a Sync ID, then both the Synchronize Datafiles... and Remove Sync ID... items under the File menu will be disabled.)
4. The following dialog will appear. Click the Sync Locally button.

5. At this point, an Open dialog will appear. Navigate to the other sync file, select it, and click the Open button.
6. You will see a Synchronizing... progress panel. When it closes, the synchronization process is complete.
NOTE: If, for any reason, the file structure of the two datafiles does not match, you will see a notification, and iData Pro will not try to synchronize them.
See the section on Manual Synchronization, below, to learn how iData Pro allows you to resolve those cases where changes have been made to the same record in both datafiles.

