Kinds of Links
Beginning with version 3.0.0, iData can now store permanent links
that are not in standard URL format. (This applies to the Freeform Text
Area only. Links in fields must be stored in standard URL format.)
Standard URL formats include forms like the following:
http://www.idata3.com
file://localhost/Users/mikew/Documents/almondfly.jpg
webmaster@raccoonbend.com
We will refer to this type of link as a "URL-format link".
iData has alwasy been able to recognize these forms and turn them
into clickable links. However, it did not store links to text in other
formats.
For example, the link at the bottom of this page, Return
to Main Help Page, represents a URL of iData
Pro Help.html,
which is not obvious from the text itself.
We will refer to this type of link as a "hidden-URL link".
Adding Hidden-URL Links via the Link Panel
1. Select the text in the Freeform Text Area that
you want to show up
as a link.
2. Open the Link Panel by selecting
Link...
in the
Text
sub-menu, under the Format
menu (or type command-control-L).
You
can also open the Link Panel by clicking the Open Link Panel button in the
Toolbar:
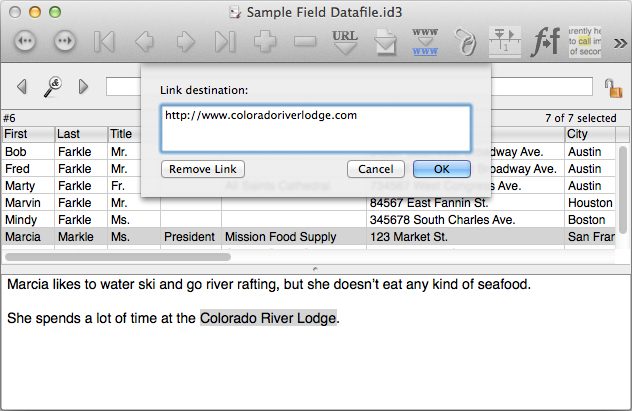
Here is the link panel with a Web page link pasted in. As you can see,
the text "Colorado River Lodge" is highlighted in the Freeform Text
Area. This is the text that will get the hidden-URL link attached to it.
3. When you are satisfied with the link destination
text, click the OK button. In
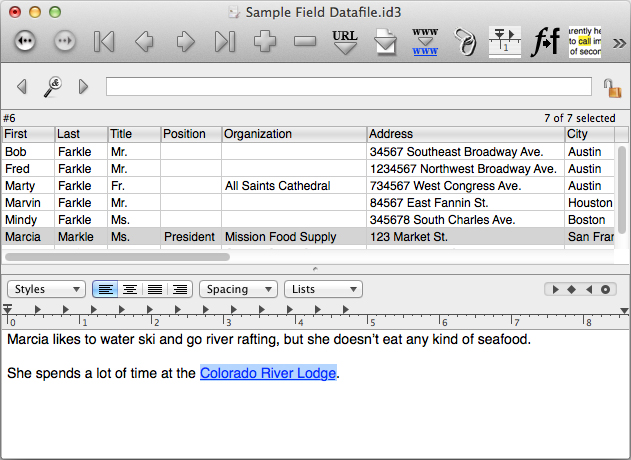
our example, the
"Colorado River Lodge" text now shows up as a link.
Removing a Hidden-URL Link
To remove a link:
1. Select all of the
linked text.
2. Open the Link
Panel, as explained
above.
3. Click the Remove Link button. Now the
highlighted text
will no longer show up as a link.
Note that this only works for hidden-URL
links. iData Pro automatically restores URL-format links.
List...
(return to top)
You can set a block of text to be formatted as a list, with bulleted
items or numbers that will be added automatically to each paragraph
within the list.
To create a list:
1. Select the text to which the list setting is
to apply, or just start a new paragraph.
2. Select List...
in the Text sub-menu, under
the Format menu. You will see
the following dialog.

3. The Bullet/Number popup menu lets you
select list item markers from among Arabic numerals, uppercase Roman
numerals, lowercase Roman numerals, lowercase letters, and uppercase
letters, all of which will automatically increment when you add items
to the list. Or, you can select one of several graphic symbols, such as
bullets, check marks, etc.
4. You can also type
some text into the Prefix and Suffix boxes, if desired. These are
pieces of text that will be added in front or or behind the list item
markers.
5. Apple's
documentation for the Prepend
enclosing list marker option says: "Specifies that a nested list
should include the marker for its enclosing superlist before its own
marker." We are confident that someone will find this useful.
Table...
(return to top)
To add a table to the Freeform Text Area:
1. Select Table...
in the Text sub-menu, under
the Format menu. Make your
settings in the following dialog, then click the close button in the
upper left.

2. Once the settings
are made, you can add text to the cells of the table.
(return to top)


