This method of securing information in iData was suggested by a
user of iData Pro. It allows you to encrypt and password protect
specific datafiles in iData Pro. The datafiles will be protected
when iData is not running, but available when it is running.
The datafiles you choose to protect are put in a disk image that is encrypted and password protected. An alias to the datafile, or to a folder containing several datafiles is placed in the iData Pro Datafiles folder. When iData is run, a window asks for the password for this disk image. If the proper password is given, it will mount the disk image and datafiles can be accessed through the Datafiles menu as normal.
We have been hesitant to add password protection to iData because
without encrypting the datafiles it would offer little protection.
Adding encryption to software requires a license from the US
Government and can restrict international distribution. With this
method, encryption is handled by the Mac OS, so no encryption
scheme is contained within iData.
Please read the following carefully, to make sure that you don't
miss any steps or fine points in the process.
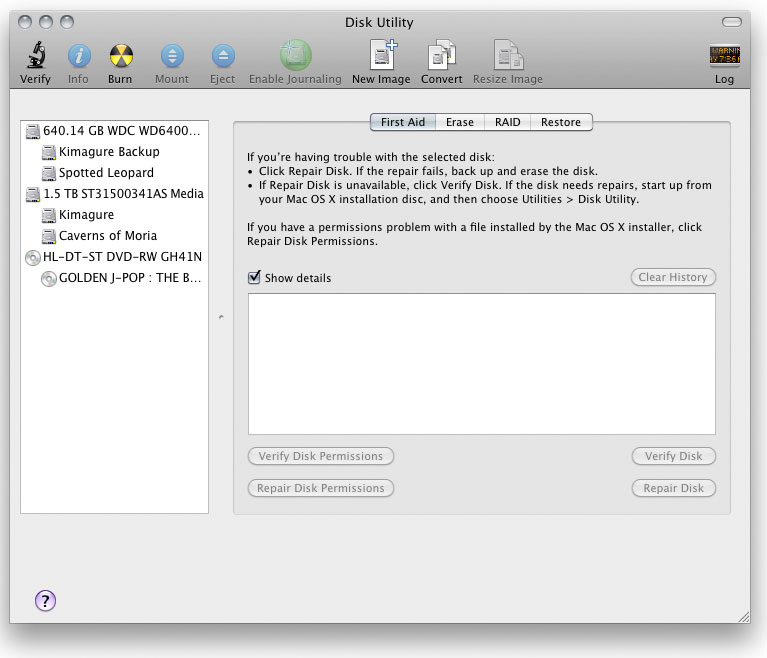
1. Open the Disk Utility app. You will find it in the Utilities folder in your Applications folder.

2. Click the New Image icon in the toolbar.

This will bring up the following window:
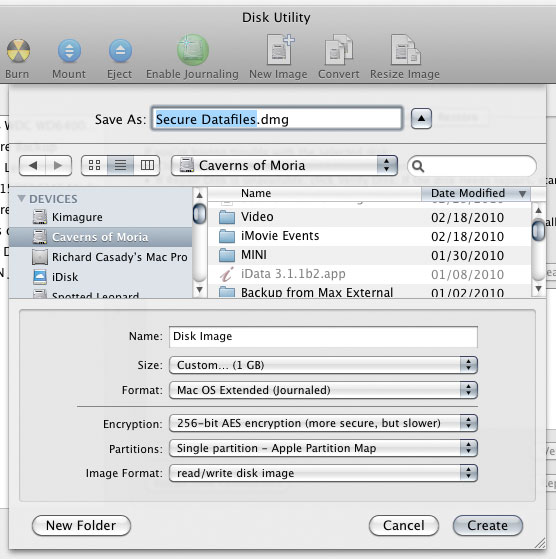
3. Name the disk image and set it to be saved where you want it. It can be on any hard drive that is always available to your Mac. Do not click the Create button yet. Various settings need to be made first. The Save As: name will be the file name listed in the Finder. The Name: lower in the window is what it will be called when mounted.
4. Set the desired size for the disk image. This is a fixed size and will not expand as your datafiles increase in size. So, allow enough room for the datafile/s to expand in size. In the illustration it has been set to a custom size of one GB. What you set will depend on what you intend to put in it, and how much spare disk space you have available.
5. Format: should be Mac OS Extended (Journaled).
6. Set Encryption: to either 128-bit or 256-bit. The 256-bit setting is more secure, but takes longer to mount. This will slow the launching of iData. The disk image will be decrypted when iData launches, then all datafiles in the image will be directly available to iData without further decryption. So, it is only the launch that is slowed. 256-bit takes about twice as long as 128-bit. The actual time will depend on the size of the disk image and what is in it.
7. Set Partitions: to Single, and Image Format: to read/write.
8. When you have everything set the way you want it, click the Create button.
9. A window will appear asking you to set a password. Be sure to
use something you will remember. If you
forget it, the data in this disk image will be lost and gone
forever. You should make regular backup copies of
your password-protected datafiles and place them in a secure
location, just in case you do forget your password.
10. It is very important to disable the Remember password in my keychain checkbox. If it is checked, anyone will be able to access your files simply by running iData or double-clicking the disk image file.
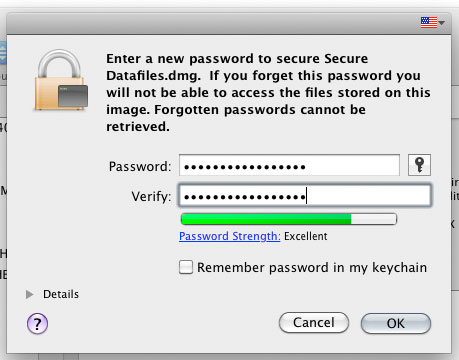
11. Click the OK button and the disk image will be created.
12. Locate the disk image in the Finder and double-click to mount it.

From here there are two ways to set up your datafiles in the disk image. One method uses an alias for each datafile, and the datafiles will show up in the Datafiles menu as a datafile normally would.
The other method uses an alias to a folder in the disk image. This creates a subfolder in the Datafiles menu, and any datafile you put in the folder on the disk image will show up in that subfolder in the Datafiles menu. This method is easier if you have a lot of datafiles you want to protect, and you don’t access them frequently.
We will start with the first method of using an alias for each datafile.
1. Move a datafile you wish to have protected into the disk image window.
2. Make a backup copy of the datafile on a CD or thumb drive and put it in a safe or bank safety deposit box. You should have a backup in a secure location in case your hard drive dies, or you forget the disk image password.
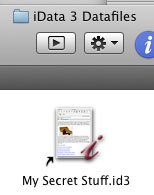
3. Make an alias of the datafile in the disk image.
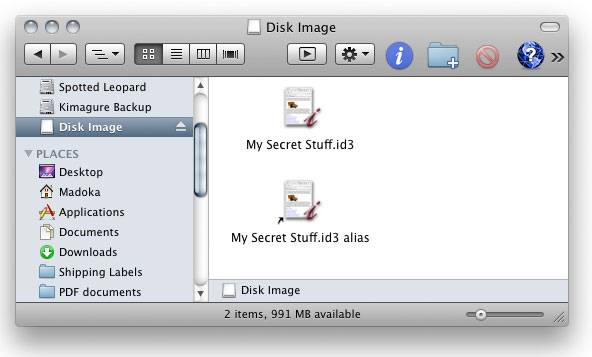
5. After copying the alias to the iData Pro Datafiles folder you can delete it from the disk image.
6. You can remove the word “alias” from the file name of the alias in the iData Pro Datafiles folder, if you wish.
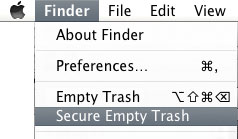
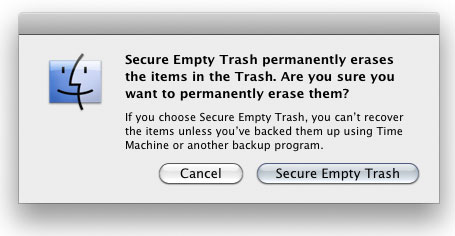
7. Now that you have the datafile set up in the secure disk image, and a backup copy of the datafile has been secured in a bank vault, delete all other copies on your hard drive. Protecting one copy of a datafile wont keep your data safe if you have other copies that are not protected. Simply dragging the other (not secured) copies to the Trash is not enough. You must also securely empty the trash to prevent anyone from getting at your data with a file recovery program. In the Finder, select Secure Empty Trash from the Finder menu.
8. This process can be repeated for each datafile you wish to secure with a password.
9. When you quit iData, you must unmount the disk image if you want the datafiles to be protected while your Mac is running. Click the Eject button to the right of the disk image listing in your hard drive listing.

When you restart or shutdown the Mac, the datafiles will automatically be protected.
If you want to your secure datafiles to show up in a submenu in the Datafiles menu, use the process below.
1. Create a folder in the disk image, and give it a name that you want to use for the subfolder in the Datafiles folder.
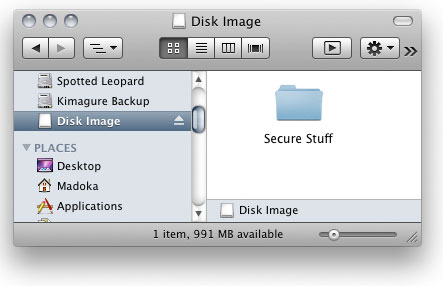
2. Create an alias for the folder by clicking on it once and selecting Make Alias in the File menu.
3. Drag the alias into the iData Pro Datafiles Folder where your regular datafiles are kept.
4. Drag any datafiles you wish to secure into the alias to the
secure folder.
5. Make a backup copy of the secure folder on a CD or thumb drive and put it in a safe or bank safety deposit box. You should have a backup in a secure location in case your hard drive dies, or you forget the disk image password.
6. When you quit iData, you must unmount the disk image if you want the datafiles to be protected while your Mac is running. Click the Eject button to the right of the disk image listing in your hard drive listing.

When you restart or shutdown the Mac, the datafiles will automatically be protected.
7. Now that you have the datafile set up in the secure disk image, and a backup copy of the datafile has been secured in a bank vault, delete all other copies on your hard drive. Protecting one copy of a datafile won't keep your data safe if you have other copies that are not protected. Simply dragging the other (not secured) copies to the Trash is not enough. You must also securely empty the trash to prevent anyone from getting at your data with a file recovery program. In the Finder, select Secure Empty Trash from the Finder menu.