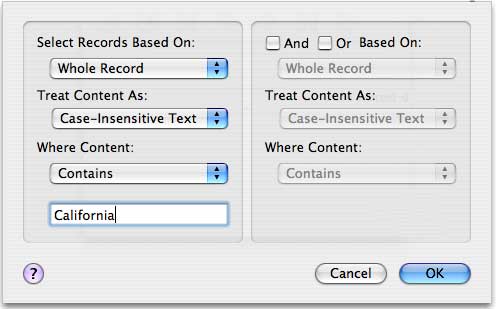
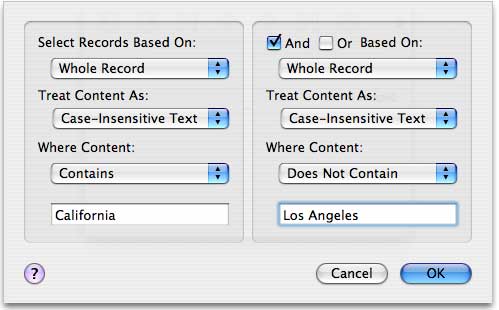
The illustration above shows how you
would select
all records that contained "California".
If this were a simple freeform address
file, the
second selection example, above, would select all addresses in
California outside of Los Angeles.
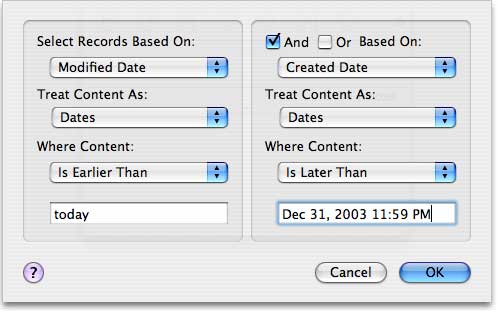
Every record in iData Pro has a hidden
creation date and modification date. These dates can be used in the
selection process by selecting Created
Date or Modified Date
in the Select Records Based On:
popup menu, the selecting Dates
in the Treat Content As: popup
menu. The example above would select all
records that
were created in 2004 or later, but not modified today.
(Note that iData does provide
a way
to view the created and modified
dates for each record.)
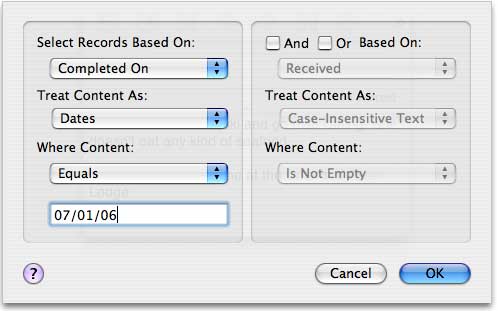
Text in fields can also be treated as
dates, rather than as literal text. The example above will select not
only records in which the
Completed On
field contains "07/01/06", but
also records in which it contains text such as "1 Jul 06" and "July 1,
2006". This also permits "Earlier Than" and "Later Than" comparisons,
as shown above for creation and modification dates.
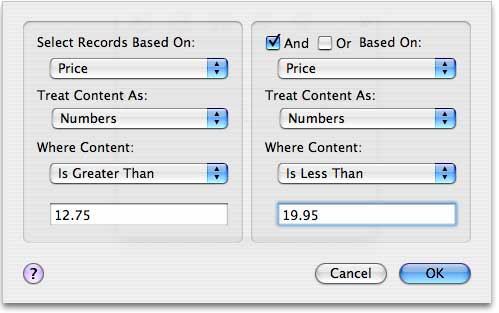
In a similar way, text in fields can be
treated as numbers,
rather than as literal text. This permits "Greater Than" and "Less
Than" comparisons based on numerical value, as in the example above.
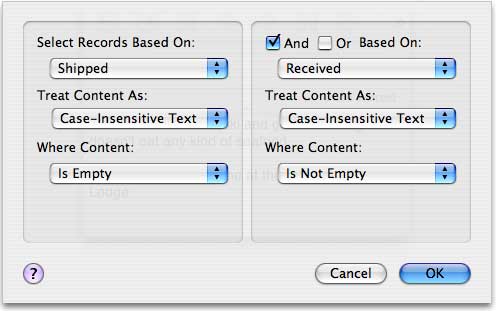
If the datafile has
fields, you can limit the selection criteria to a specific field. In
this example from my online purchases datafile, the selection would
show
records for purchases where the item has shipped, but not yet been
received. I find this useful for tracking orders.
NOTE: It is also possible to create a selection of records by entering text in the Find Box.
A More Complicated Example
iData Pro lets you set up two criteria for
a selection
in the Select Records window. However, there are other commands in the
Select menu that will give you the ability to
make
much more elaborate selections. Let's say you have a list of customers
for
your automotive racing parts company. The list includes the customer's
address,
email address, type of car they own, and whether they want to receive
notification
about new products. You have a new racing exhaust system for Honda and
Acura
cars, but is not street legal in California, Massachusetts, and Iowa.
So, you want to do a mailing to the
people who
have purchased one of the two products, want to be notified, and are
not
in California. That is more than you can do in the Select Records window. Here is how you would make such
a selection.
1. Select records that contain CA or MA
in the
State field. Now, only the records for customers from California and
Massachusetts
will be selected.
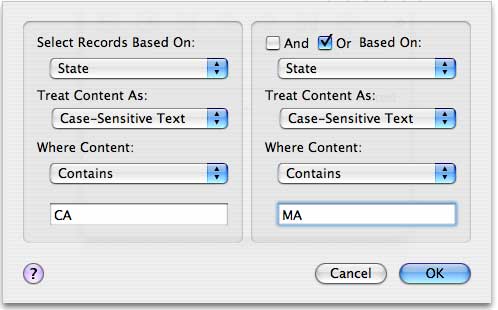
2. To add all Iowa customers to this
selection we will use Select More from Omitted... from the Select menu. In this window, select records
where State contains IA. Now all California, Massachusetts, and Iowa
records will be selected.
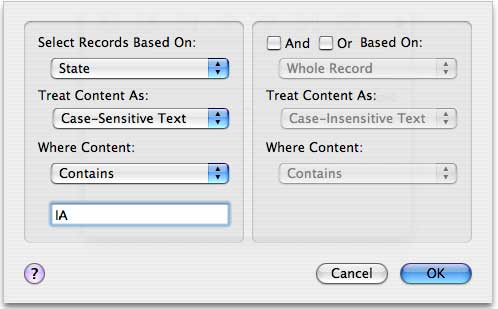
3. From the Select menu, choose Switch to Omitted to change the selection to all customers
not from California,
Massachusetts, or Iowa. So, now you have all the customers in states
where the new racing exhaust is street legal.
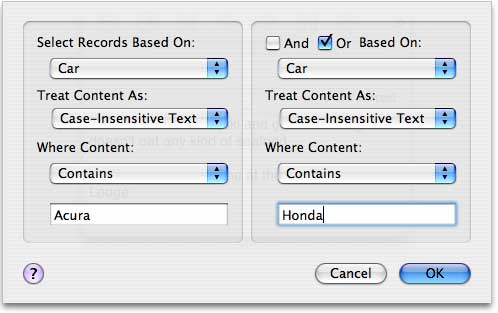
4. Now we want to limit the selection to
owners of Acura and Honda cars. With Records... in the Select menu make a selection where the Car
field contains
Acura or Honda. This will result in a selection of all Acura and Honda
owners
in states where your product is street legal.
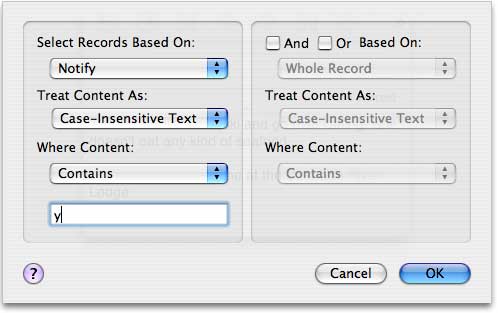
5. There is only one step left. That is
to select
only the customers who wish to be notified. Simply select records where
the
Notify field contains "y".
Now, only customers who want to learn
about new products, have an Acura or Honda, and don't live in CA, MA,
or IA are selected. You can go through the records and send email
messages to all of them, or you can save the file with the Save
Selected As... item in the File menu.
A selection will not be saved when you save a datafile and
close it. When it opens again, all records will be selected.
If you get into trouble when making a
selection and it doesn't come out the way you wanted, you can use All
Records in the Select menu (or type command-option-A)
to select all records and start over. Or, you can use the Revert to
Previous Selection to just go
back one step.
Occasionally, you may find the Deselect
Current
Record command useful to remove
one
or two records from a selection. If you did a select for records where
State
begins with "ca" (to select California records), and one customer is
from
Caledonia, you can just deselect the one record. Use the command-option-control-D key
combination to perform this command from the keyboard.

